
Many Windows users often encounter problems related to the networking of their drives or other aspects of the operating system. Unfortunately, they don’t always have a playing field to work with. A common problem faced by Windows users is receiving the error message “The default gateway is not available” when trying to connect to a network.
If you have this Internet connectivity problem, it could be due to several factors. Outdated network drivers, incorrect router settings, wrong IP addresses or even McAfee Security Solutions can contribute to this problem.
Since you are unable to access the Internet due to this problem, it is essential that you find a solution quickly and avoid complications. If you are having difficulty troubleshooting the “The default gateway is not” error, consider trying one of the following solutions;
Removal of McAfee Security Programs
If you suspect that any of the McAfee security programs are causing this problem, try uninstalling all McAfee security software from your computer. To do this, open the Control Panel on your computer. Remove all McAfee products listed there. Once you have successfully uninstalled the McAfee software, the problem should no longer persist.
Updating network adapter drivers
Your network is adjusted according to the order in which you express your problem. If you encounter the error message “The default gateway does not appear on your screen, it could indicate that the driver associated with your network device is out of date. To potentially solve this problem, consider installing the driver for your network device. However, please note that there is no guarantee that this will solve the problem you are experiencing.
To update the driver for your network adapter you have two options; visit the manufacturer’s website and download the version or use the Device Manager.
These are the steps you can follow;
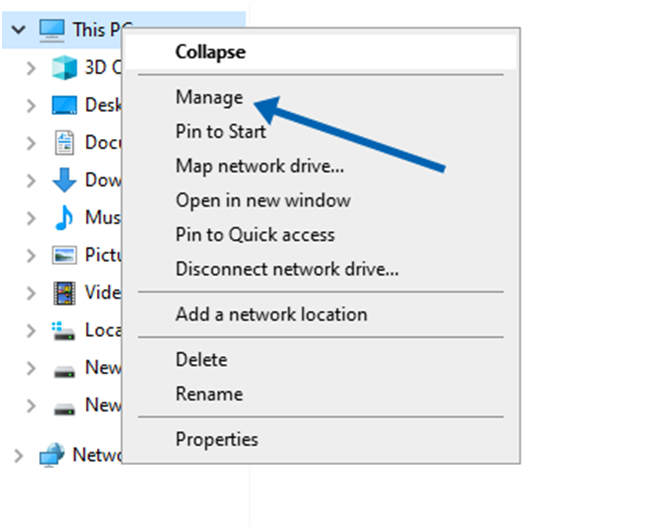
To access simply right click on “My Computer”. Choose the “Manage” option in the menu. Alternatively, you can type “Device Manager” in the Run box. Press Enter.
2. You can expand the network adapter by clicking on it.
3. To update the driver software, for the network adapter, click Network adapter driver. Select Update driver software.

4. Choose the option to allow Windows to search for a driver on your behalf. Windows will automatically search the Internet for and install driver updates.

Uninstalling Network Adapter Drivers
To solve this problem, you can try uninstalling your network card drivers. Don’t worry about not having the necessary network adapter drivers, as you can easily reinstall them after removing them. Windows will take care of reinstalling them. Here are the steps to uninstall your network adapter drivers;
You can access it by clicking on “My Computer”. Selecting “Manage” from the options that appear or typing “Device Manager” in the Run box and pressing Enter.
- To expand the LAN card simply touch it.
- Then locate the Uninstall button under the network adapter driver. Click on that…

2. After removing the driver, be sure to restart the computer.
3. Once Windows restarts, it will restart automatically. Install the drivers.

Wireless frequency band change
This problem can also arise due to a discrepancy in frequencies between your WiFi router and your network adapter. If you recently switched to the 5 GHz band or installed a WiFi router that operates on that frequency, this error may occur. To solve the problem, try switching to the 2.4 GHz band. You can access the router’s management console for help.
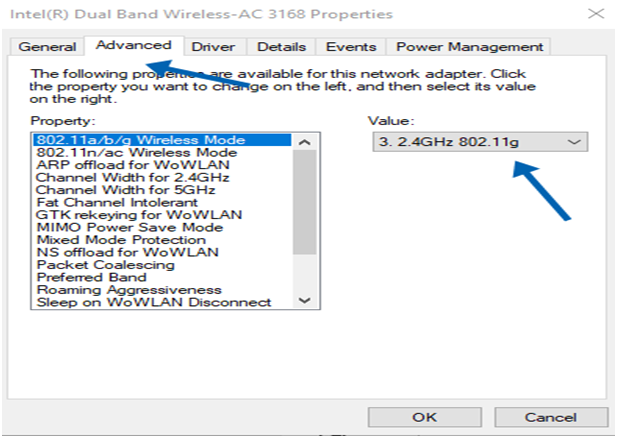
Change wireless mode
Some users have mentioned that changing the WiFi mode from 802.11g/b to 802.11g could solve this problem. To change the WiFi connection mode follow these instructions;
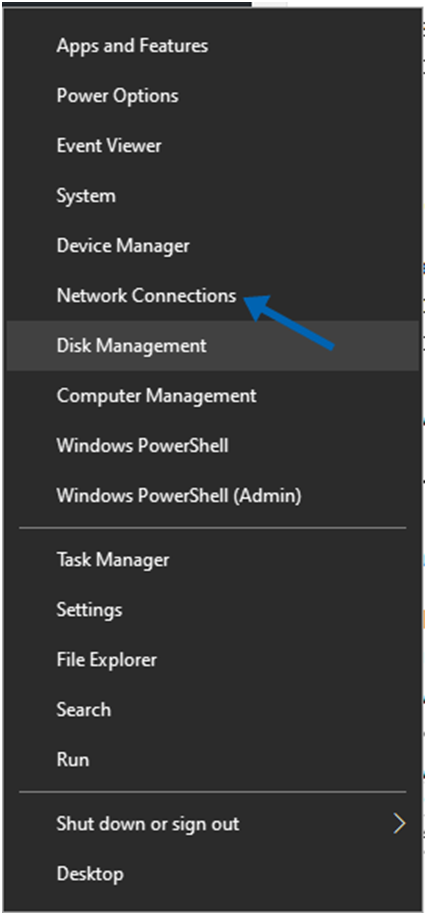
You can access Network Connections by left-clicking on the Windows icon or by pressing the Windows key and the X key on your keyboard.
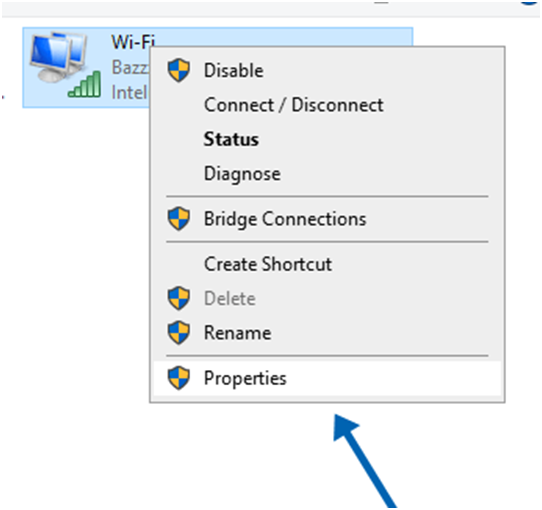
2. To adjust the configuration of your adapter, simply right click on it. Choose Properties.
Go to the configuration menu. Choose the “Configure” option.
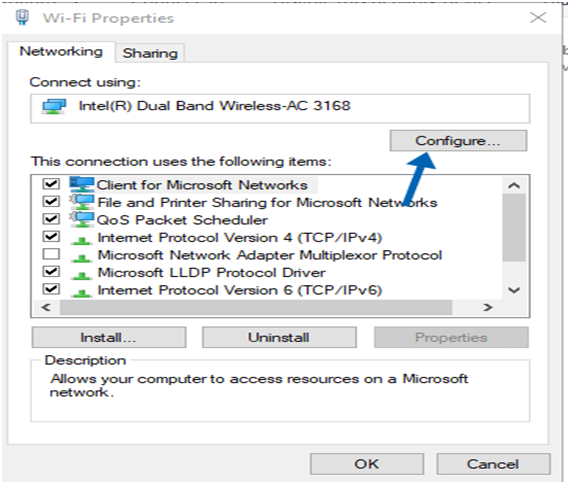
4. Find the tab “. Click on it to access the wireless settings.
5. In the drop-down menu, select the option that says 802.11g. Remember to save the changes after selecting the desired option.
Using the netshell restart command
Users have also reported success in resolving this problem by performing a TCP/IP reset using the netshell reset command. They tried this solution. I found it useful. Here are the steps you can follow in this situation;
Open the Start menu. Type “cmd” in the search bar.
2. Right-click on the Command Prompt icon. Choose “Run as administrator”.
3. Now enter the following command at the location;
4. Use the command “netsh int reset ip” to completely delete your IP address.
It would be great if you could restart your computer afterwards so that you could verify if the problem was resolved.